Photographed with Panasonic Lumix LX7. Color correction in Lightroom 5.
Click image for larger view (1200×800).
Loving how ‘advanced compact’ cameras are now good enough to make a handy stand-in for the DSLR. Not the same resolution, and not quite the same image quality, but small enough to carry all the time, and good enough to capture the photographer’s vision when the opportunity arises.
Color correction and grading are often used to promote a style, ambiance or ‘look’ rather than reflect reality. You want to meet the viewer’s ideal expectations, not boring reality.
After writing my last blog post, I realised there was no video that showing my tips on AVCHD editing being used in anger. This quick post puts that right. You can see the associated video here or by viewing the video below (I recommend you watch it full screen at 1920×1080).
Note that the youtube version is compressed from the original 28Mbit/s to 8Mbit/s, as are most web videos).
Note also that I don’t use a Sony Alpha A77 for the footage in this post: I use a Panasonic Lumix LX7 because I was traveling light, and the LX7 is my ‘DSLR replacement’ camera of choice. Both cameras use the same video codec and bitrates, so there is not much difference when we come to post production, except that the Sony Alphas have better depth of field and are therefore more ‘film like’, whereas the LX7 will produce sharper video that is less ‘filmic’.
Changing the time of day with post production
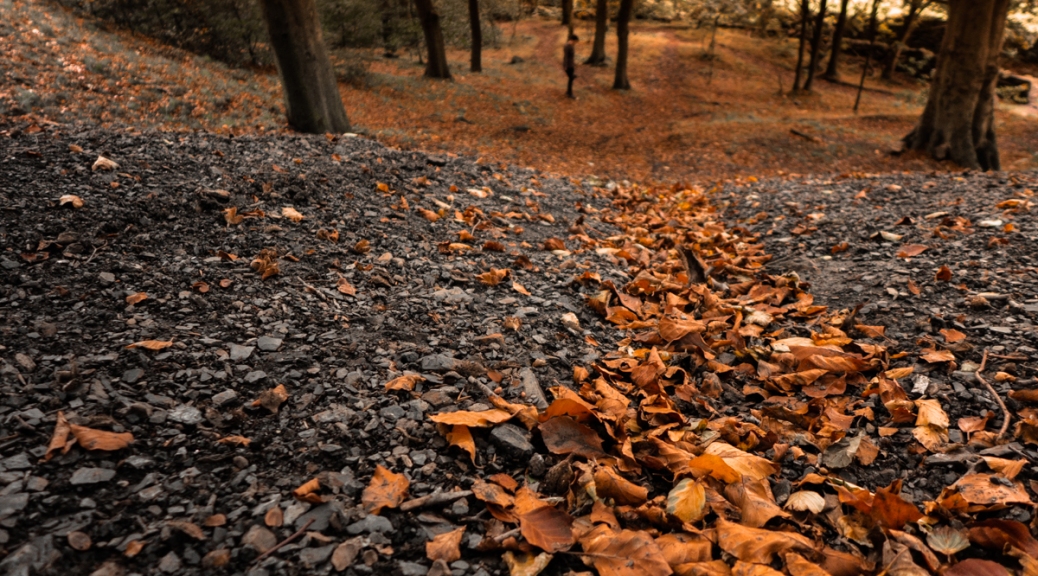
Myself and my partner were recently walking on Bingley moor (which is in Yorkshire, England, close to Howarth and Halifax, places associated with Emily Bronte and Wuthering Heights).
The final footage. Color grading and correction via Tiffen Dfx running within Adobe Premiere. Click on the image to open the original frame (1920×1080).
It was about an hour before sunset, and I thought it would be nice to capture the setting sun in video.
The original raw footage. Captured with a Panasonic Lumix LX7 with attached Polaroid variable ND filter.
Alas, we were too early, and the recordings looked nothing like what I wanted.
A couple of weeks later we were walking in the same place in the early morning. I took some footage of the nearby glen (glen – UK English: a deep narrow valley). So now I had some footage of the moor and glen in evening and morning sun, but no sunset footage. Not to worry: I could just add the sunset via post production.
If nothing else, it would make a good example of how AVCHD footage can be edited whilst making large tone/color corrections without coming up against issues once you follow the handy tips from the last post!
The original footage
As per the tips in the previous post, I did the following whilst shooting the original footage
Shot the footage using a fixed shutter and aperture, and varied exposure using a variable Neutral Density Filter. Reason: as a general rule, shoot all footage at a fixed aperture (typically around f3.5, going wider if you want low depth of field, or narrower if your subject is in the distance), and fixed shutter (typically twice the frame rate of your footage). Control your exposure via a variable ND filter.
Set the camera to record desaturated, low contrast and un-sharpened footage. Reason: this gives your footage more latitude for change in post-production.
Exposed the footage slightly brighter than I needed, being mindful of burning highlights. Reason: AVCHD tends to break up or produce artifacts if you increase exposure, but never if you decrease exposure.
Workflow
Color post production has two workflow areas
Color correction or correction of faults in the footage. A bucket could be too red, or a sky needs to be be more blue. Correction is done on a per clip basis, correcting color/tone issues or adding emphasis/de-emphasis to areas within the scene. Framing and stabilization is also performed on a per clip basis. As an aside, this is the reason why the left side of the footage seems to wobble more in the video: the right side has been stabilized with the inbuilt Adobe Premiere stabilization plugin.
Grading or setting the look of the final film. Grading is done equally too all clips and sets the final style.
Color correction
Here’s a quick run through of the corrections:
Color correction
Top image. As-shot.
Second Image. Added an emulated Tiffen Glimmerglass filter. This diffuses the sharp water highlights and softens the video a little (I would not have had to do this if I was shooting with my Sony Alpha A77, and you would not have to soften the video if you were using any other traditional Canon/Nikon DSLR as all of them produce soft video). I also added a Fast Color Corrector to fix a few color issues specific to the clip (white and black point, cast removal).
Third image. Added a warm red gradient to the foliage top left to bottom right. The shape and coverage of the gradient is shown in the inset (white is gradient, black is transparent).
Fourth image. Added a second gradient, this time a yellow one going from bottom to top. Again, the shape and coverage of the gradient is shown in the inset.
Color Grading
For this footage, I used an emulated film stock via Tiffen Dfx. The stock is Agfa Optima. I also added back a little bit of global saturation and sharpness using the default Adobe Premiere tools (Fast color corrector and unsharp mask).
Color Grading
Top Image. Corrected footage so far minus the two gradients
Middle image. Grading and global tweaks (Agfa Optima stock emulation plus global color tweaks and sharpness).
Bottom Image. Adding the two gradients back for the final output.
Merging color correction and grading
Combining the two color change tasks (grading and color correction) is a bit of a black art, and I do both together. Generally, I start by picking an existing film stock from Tiffen Dfx or Magic Bullets Looks as an Adjustment layer. Then, I start adding the clips, color correcting each in turn, and switching in/out the grading adjustment layer as I go. Finally, I add a new adjustment layer for sharpness and final global tweaks. I avoid adding noise reduction as it massively increases render time. Instead, I add a grain that hides noise as part of the grading.
Reality vs. Message
Color correction and grading are often used to promote a style, ambiance or ‘look’ rather than reflect reality. You want to meet the viewer’s ideal expectations, not boring reality.
Color corrected/graded scene
The video includes this frame. The leaves in the water are red to signify the time of year (autumn/fall).
Original scene (note also that the original scene is lighter than the final scene, as per my AVCHD shooting tips)
Real leaves in water lose their color quickly, becoming much more muddy in appearance. I enhanced the muddy leaves towards earth-reds because ‘muddy’ did not fit with my message, even though rotting grey leaves are closer to reality.
Timeline
Here’s the timeline for the project.
Project timeline (click on image to view full size version)
I have my color adjustment and grading in as separate adjustment layers. (V2/V3) The first half of the timeline is more or less identical to the second half except that the second half has the unedited versions of the clips on layer v4. These clips have a Crop effect (Video Effects > Tranform > Crop) on them with the Right value set to 50%. This is how I get the edited/unedited footage split-screens at the end of the video.
When adding backing sound, the music file is never as long as the video clip, so to make the two the same length, I often do this simple trick to edit the music so it is shorter:
Put the music clip on the timeline so that the start of the music lines up with the start of the footage, and
On a different sound layer, put another version of the same music on a the layer below such that this time the end of the music lines up with the end of the video.
Make the two soudclips overlap in the middle, and where they overlap, zoom into the waveforms and find and match the percussive sounds (generally the drums).
Fade between the two sounds on the overlap.
Matching the sound sections
In the timeline section above, I have matched (lined-up) the drum sounds on the layer a1 and a2 music clips (both of which are different sections of the same music file), then faded from layerA1 to A2 by tweening volume level. This will produce a smooth splice between the two music sections. If space allows, you should also of course match on the end of the bar (or ‘on the beat repeat’). For my timeline, you can see (via the previous ‘Project timeline’ screenshot) that I have spliced between four sections of the same file.
Tools
During color correction I kept an eye on the YC waveform scope, which is available in Premiere and most video editing applications.
Footage vs YC waveform
The YC wafeform shows both Luma (Y or brightness) and Chroma (C or color). Luma is Cyan, and Chroma is dark blue on the scope.
The x axis of the scope is the x-axis of the footage, so points on the y-axis are the YC values along the width of the footage itself. Sounds a bit complicated, but if you use the waveform on your own footage it becomes immediately obvious what the waveform represents.
For the broadcast standard I am using (European, PAL), true black is 0.3V on the scale, and true white is 1.0V (NTSC is very similar). The original footage is shown on the left side of the image, and the corresponding YC wafeform is shown below it. The waveform shows highlights in the sky area are clipping (we see pixels above 1.0V), and the darkest areas are not true black (the wafeform doesn’t get down to 0.3V). The right side of the image shows the final footage and we can see that we now have no clipping (in either brightness or color saturation), and our blacks are closer to true black.
Keeping an eye on the YC waveform is always something I do when editing color. You may think your eye is good enough, but your vision gets tired or so used to color that it no longer recognizes casts, but the scope never tires and lies! Another useful scope to use for skintones is the Vectorscope. Something for another post…
Conclusion
This post shows the workflow I used to correct a small number of clips such that they could be added together into a single scene. The final movie shows a typical English autumn sunset (or at least, one where you can see the sun!) yet none of the clips were actually taken at this time of day nor under the lighting conditions of the final scene.
By manipulating the color of our footage via color correction and grading, we achieved our desired output despite the constraints of reality on the day!
Finally, by following additional steps and rules of thumb whilst shooting and editing the AVCHD footage, we have prevented coming up against its limitations. In fact, the only time in the video where you may see any artifacts is the only place where I did not follow my own advice: at about 0.30″ I the footage has exposure increased slightly, and shows small artifacts in the shadows.
You can see all previous video related posts from this blog here.
Notes
The music in the video is Spc-Eco, Telling You. Spotify Link.
The YC graph is so much more useful than the histogram seen on most stills cameras that I often wonder why digital cameras don’t have the YC waveform instead! For example, the YC waveform not only tells you whether your image has clipped pixels, but unlike the Histogram, the YC tells you where along the width of the image those pixels are! You can still ‘shoot to the right’ using the YC (and it actually makes more sense) since brightness is Luma height. The YC also separates out brightness and color information, so you can see at a glance the tonality and color information within your photograph in a single visual. How’s that for useful!
AVCHD is designed to faithfully compress and decompress your original footage so that you cannot tell the difference between AVCHD vs full frame film when played back on a typical consumer 1920×1080 screen. So for all intents and purposes, the AVCHD format is lossless: you can’t tell the difference. What’s the catch?
If you look on the internet, you will find all sorts of advice that the A77 and other Sony Alpha cameras are useless for video. The image doesn’t ‘pop’ because the bitrate is too low, and you can’t easily edit the video because AVCHD ‘breaks up’ if you tweak it too much. But then you see something like the video below on youtube. The foreground is clearly separated from the background to give the ‘3d’ effect, and there’s tons of post processing in this footage to give it plenty of ‘pop’, and it all looks great! How was it done?
To create decent video with the Sony Alpha, you need a good understanding of the video file type used by Sony (and Panasonic) cameras: AVCHD, plus how to shoot and handle AVCHD to give you lots of latitude in post processing.
Core issues to know about are line skipping, bitrate and dynamic range. The Sony Alpha is average on line skipping and bitrate, and the king of dynamic range. As we will see, any video DSLR is a set of compromises, and getting the best out of any DSLR involves playing to the strengths of your particular model and codec, something that is very important with the A77
My video cameras. L-R: Sony Alpha A77, Panasonic Lumix GH2, Panasonic Lumix LX7
I have noticed a lot of converters from the Sony A77 to the Panasonic GH2 appearing on the video DSLR forums. Clearly, a lot of people have got suckered into the cult of high bitrate and decided that the Sony Alphas are useless for video. I own a GH2 (complete with that magic hacked +100 Mbit/s AVCHD) and will save you the trouble of GH2 envy by showing that bitrate is not always king in video. In fact, along with the GH2/GH3, there is another type of stills camera that gives sharper video than a typical FF/APS-C DSLR and I will consider three types of AVCHD video DSLRs in this post:
Large sensor stills camera DSLRs with manual video. This includes all Full frame and APS-C cameras, and I consider the A77, which I of course own and will be the focus of this post.
35mm film sized DSLRs with manual video. Micro Four Thirds (MFT) has a sensor size smaller than the Full frame and APS-C cameras, but very close to 35mm film (that’s 35mm film, not 35mm stills film – big difference that, incidentally, means that all the Canon 5D people going on about their ‘filmic depth of field’ are overcooking it!). For this size I will look at the Panasonic GH2, a camera I own.
Small sensor advanced compact cameras with manual video. These cameras can shoot RAW and have most of the features of full frame DSLRs but have very small sensor sizes (i.e. 1/2.3”… the size of your smallest fingernail). These sensor sizes don’t suffer from soft video (which we will look at later). The perfect example of such a camera is the Panasonic LX7, which comes with a very video friendly 28-90mm f1.4-f2.3 lens that can take a 37mm ND filter, making it ideal for quality pocket-sized video. Oh, it also has an ND filter built in, so you often don’t even need a screw on filter unless in direct sun. Cool!
A lot of this post will concentrate on the A77, but because all three cameras shoot AVCHD footage, much of the post will actually be common for all three cameras
Before we get too far though, let’s address the elephant in the room…
How good is Sony DSLR video?
The Sony A77 can record up to 28Mbits/s. The highest you need for web or DVDs is about 12Mbit/s, and its less than 8Mbit/s for Youtube/Vimeo. You lose the extra bandwidth as soon as you upload to Youtube/Vimeo or burn a DVD.
Sony and Panasonic chose 28Mbit/s for a reason – an advanced enthusiast will rarely need more bandwidth. 28Mbit/s is a good video quality for the prosumer, which is most readers of this post.
If you approach a terrestrial broadcaster (such as the BBC) with video work, they will specify 55Mbit/s minimum (and they will need about 40Mbit/s if they want to sell Blue-rays of your show), but they will also expect your camera to natively and continuously output a recognized intermediate codec that can be used to match your footage with other parts of the broadcast unless you can justify otherwise. Particular action shots, reportage and other use-cases exist for DSLRs, but you have to be able to justify using a DSLR for them beyond just saying ‘it’s all I’ve got’.
No DSLR does the ‘native recognized intermediate codec’ bit (unless we count the Black Magic pocket cinema as a DSLR, but then it isn’t primarily a stills camera), and instead produces output that is too ‘baked in’ too allow strong color corrections. The A77 can’t and neither can the 5D Mk 3 (at least, not continuously and not using a recognized format), nor the GH2/GH3. Yes, the 5D was used for an episode of House but the extra cost in grading the footage meant there was no saving over using a proper video camera from the start.
The Sony A77 cannot be considered a pro video device. Neither can any other stills camera. This is a crucial point to consider when working with DSLR video. Yes, you can create pro results, but only if you have the time to jump through a few hoops, but renting pro equipment when pro work appears may be cheaper overall and get you where you want to be quicker.
Finally, its important to realize that a hacked camera has drawbacks. I do not use the highest bitrate hack for my GH2 (as of this writing, the 140Mbit/s Driftwood hack), instead using the 100Mbit/s ‘FlowMotion’ hack. Driftwood drops the occasional frame. Not many, but enough for me to notice. That’s the problem with hacks: they are fine for bragging rights and going around saying you have ‘unlocked your cameras full capabilities’, but the same hacks make your gear less reliable or produce more noise or other glitches.
So, the A77 is about equal to its peers for prosumer video. Some have better bitrate, some can be hacked, and some have better something else, but none of them can say they have moved into professional territory.
AVCHD and why it is ‘not a codec for editing’
It’s important to realize that a file format (such as an .mts or .mp4) is NOT a codec before moving on. See notes 1 and 2 if you need more information.
Rather than use a low compression codec to maintain quality (as used in pro film cameras), Sony and Panasonic realized that using faster processing power to compress and decompress frames very efficiently might be a better idea. That way, you get low file size and higher quality, and can then store your video on slow and small solid state devices such as (then emerging) solid state SD cards. The resulting video codec is a custom version of H.264 (which is itself a derivative of the popular but now old MPEG4 codec) and is the codec that AVCHD (Advanced Video Compression High Definition) uses. The custom codec AVCHD uses is more efficient than older, less processor intensive codecs, and therefore provides better quality given the same file size.
So why is AVCHD good for burning wedding videos but not shooting Star Wars?
AVCHD is designed to faithfully compress and decompress your original footage so that you cannot tell the difference between AVCHD vs full frame film when played back on a typical consumer 1920×1080 screen. So for all intents and purposes, the AVCHD format is lossless: you can’t tell the difference. What’s the catch?
It all works unless you edit the AVCHD footage. The compression optimizes for the original video and leaves no wriggle room for changing color or tone. Doing so will cause your video to show compression artefacts (usually blockiness or banding). Unfortunately, changing tone/exposure and color are two things you will want to do often in video editing!
Because AVCHD compression/decompression trades filesize for a cpu heavy codec, your computer may be unable to play AVCHD in real time during edit.
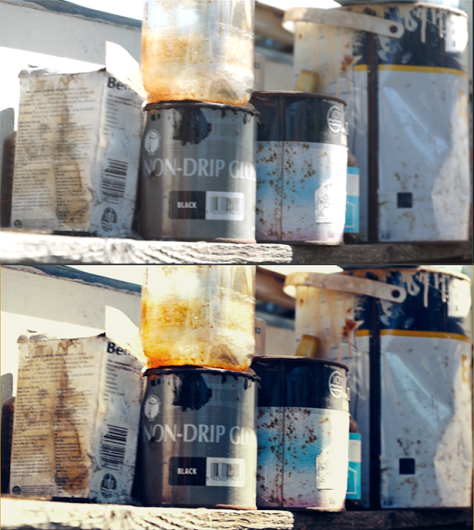
An example of macro blocking, caused by AVCHD removing some of the data in the low tone areas. It is not caused by ISO noise or other issues. The large dark grey splotches on the black container and the mushiness in the background foliage are all signs of macro blocking. All this can be avoided though, as we will see below…
There’s a lot of talk about AVCHD on the web and how it is not good enough. Whatever reason you are given, the core reason is derived from the two points above: in a nutshell, AVCHD was designed for playback and not to be edited, and is too cpu heavy to be edited in real time.
This was true 4 years ago for AVCHD, but hardware and software have caught up.
To play back 10s of 28Mbit/s AVCHD, your computer has to take a 50-100Mb file and decompress it to the multi GB file it actually is on the fly at the same time as displaying the frames with no lag. To edit and save an AVCHD file, your computer has to extract a frame from the file (which is non-trivial in itself, because the frame data is not in one place: some of the data is often held is previous frames), perform the edit, then recompress the frame and some frames that precede it. So editing one frame might actually change 10 frames. As 1 minute of video can actually be 8GB when uncompressed, that’s a lot of data!
The good news is that a modern Intel i7 or equivalent computer can handle this, and lesser CPUs can also do it if the software knows how to farm off processing tasks to the graphics card or GPU (Premiere CS knows how to do this for certain NVidia GPUs, and Premiere CC knows how to do this for most NVidia and AMD GPUs, which is almost all the GPUs worth considering). I am currently editing in Premiere using only AVCHD files, and it is all working well.
There is no need to convert AVCHD into an intermediate codec because the reasons to do it are no longer issues. You may still see old arguments on the web: check the dates of the posts!
A reason still often given for re-encoding AVCHD to other formats (such as ProRes or Cineform, which, incidentally are examples of the pro intermediate formats we talked about earlier) is it gives you more headroom in color manipulation. This is not valid anymore. As of this writing, Premiere up-scales ALL footage to 32 bit 4:4:4 internally (which in layman’s terms means ‘far better than your initial AVCHD’) when creating its footage, so encoding AVCHD into anything else for better final quality will not do any such thing. At best it will replace your AVCHD source files for files x10 larger for not much gain in quality (although an older computer may be better at keeping the edits working in real time if it can’t handle AVCHD). In fact, in a normal editing workflow, you will typically not convert your source AVCHD to anything. Just use it as source footage, and the final output is whatever your final production needs to be.
Another very good reason not to convert your input AVCHD to anything else is because re-encoding always either loses information or increases file size, and never increases quality of itself. If you re-encode AVCHD into any other codec, you either retain the same information in a larger file or lose some information when you re-compress the AVCHD data into a smaller or processor friendly format (MPEG4, AVI).
There is actually only one use-case where you must change your AVCHD files: when an application doesn’t recognize AVCHD. Even then we don’t re-encode, but instead re-wrap the AVCHD stream into a more universal file format (such as Quicktime). Don’t worry, I’ll show you how to do all this below…
Using AVCHD and working around its issues
So ‘AVCHD is ok, as long as I have a recent version of Premiere (or similar) and a decent mid-high range computer’, right? It is fine as long as you do certain things:
Don’t shorten your AVCHD files.
If you have an .mts file with a bad take early on and then a good take, don’t edit out the first take and save the shorter .mts file. AVCHD is what is known as a GOP format, which means it consists of a complete frame every few frames, with the other frames containing the differences (or ‘deltas’). Each set of frames is a GOP (Group Of Frames), and if you split the group, you may cause problems. Better to keep the .mts file as is. Never resave a .mts file as another ,mts file, or anything else for that matter. There are few reasons to do it, and you may lose information in doing so. In fact, even if you did nothing and resaved a .mts file, you may still lose information because you would inadvertently decompress and then recompress it. Note that there is one very good reason to chnage your AVCHD files: because your authoring application does not recognise AVCHD. I go through how to fix this without changing the video data (a process called ‘re-wrapping’) below.
Avoid AVCHD breaking up in post by shooting flat
AVCHD can ‘break up’ in post if you need extreme exposure and color changes. This is all to do with the fact that AVCHD was originally designed for playback and not for editing: it is virtually lossless unless you start to edit it. Each frame of an AVCHD video is split into lots of 16×16 pixel sections, and these are (amongst other things) compressed at different levels depending on the detail seen in them. Think of it as cutting up an image into separate JPEGs whose quality is varied to reflect how detailed each 16×16 area was to begin with.
So what the AVCHD compressor does is to take blocks with near solid color or shadow, and save them using less data (because they don’t actually need much data), and save the bandwidth for parts of the image that actually have lots of detail or movement. That’s fine, until you try to
brighten the shadows in post and see that it comes out as a pixelated gunky mess
try to brighten a very subtle gradient, and watch it start to band
brighten skin highlights in flat-lit skin and watch it break up and pixelate.
All these edits cause AVCHD to break up because you are trying to bring out detail in areas that AVCHD has decided are not the main areas of detail (or change), and so the compressor has saved them with low bandwidth.
How to fix this?
Don’t overexpose in post, especially skin tones or graduated sky. Its better to to overexpose very slightly in as-shot, and then underexposing in post.
Don’t brighten dark areas in post much more than ½ a stop. Again, its better to overexpose slightly in as-shot and underexpose in post.
In general, its better to overexpose your footage slightly so you will be darkening rather than lightening shadows in post (but there is a balancing act between this and burning highlights!).
Use a Tiffen low-contrast filter (or similar diffusing filter) that optically flattens tone so that highlights are diffused and shadows are lifted by ambient light. This not only gives you a more neutral look (so that AVCHD doesn’t reduce detail in dark areas) but also allows you to expose up more before you are in danger of burning the highlights. See also this post for more information on using a low contrast filter for video.
…or
Simply shoot as close as possible to the final look, and don’t make big changes in post.
You may be thinking ‘ah, that’s fine, but I can’t control the sun or the shadows, and that Tiffen filter thing is expensive’. There is one other thing you can do: shoot flat digitally.
AVCHD and other ‘not for editing’ codecs don’t have many color or brightness levels, so by keeping the recorded values of both low you are less likely to clip them or cause errors that may be amplified in post to cause banding. This subdued recording style is called ‘shooting flat’.
Before/after shots. The top one is the original ‘flat’ clip. This clip looks a little flat, but its lack of strong color and contrast means it has lots of latitude in post work. The bottom clip is the edited file. It has more contrast and color, and most importantly, is still sharp.
To shoot flat on the A77, you need to press Fn > Creative Style, then select an appropriate creative style (‘Neutral’ is a good general purpose one, but some people swear by ‘Sunset’ for banding prevention), then push the joystick to the right to access the contrast/saturation/sharpness settings. Ideally, you should set them all to something below zero (-1 to -3). The most important one is sharpness, which you should set to -3. Sharpness makes by far the biggest difference, and setting it to -3, then sharpening back up in post-production (where you are using a far more powerful cpu that can do a far better job) is the way to go.
Overexposing in as-shot. By overexposing (top) and darkening in post (bottom), your shadows have no chance of breaking up. If you did the reverse (overexposing in post), your shadows might start ‘macro-blocking’ or banding.
What if I shot the clp using a vivid style instead of flat? Well, bits of the red watering can may have ended up a saturated red. That’s fine if I leave the footage as shot, but if I want to tweak (say) the yellows up in the scene I would now have a problem: I can’t do that easily without oversaturating the red, which would cause banding in the watering can.
Another happy outcome of shooting flat is that your video takes less bandwith (but in my testing, its hardly by anything so don’t count on it).
Sharpening in post: the top image is unsharpened out-of-camera, and the lower image is the same thing sharpened (and editedf for contrast/color) in Premiere.
Finally, when color correcting, you need to keep an eye on your scopes. The one I use the most is the YC waveform. This shows Luminance (Y) and Chroma (C) across the frame.
The top image shows raw (left half) and edited footage (right half). The graph is the YC scope, showing luminance only. The right half of the footage looks better, but by checking the graph, we see that the lunanance range is also technically better (no clipping off the scale, uses more of the available range, etc).
Using the YC waveform is a full tutorial in itself and for brevity, I’ll just link to one of the better existing tutorials to get a handle on the YC waveform here (Youtube: YC Waveform Graph in Premiere Pro). Note that the YC waveform lets you check your footage against broadcast limits for brightness and saturation. A PC screen can handle a larger range, so if you are creating content for the web, you might want to go a little further on range. I limit myself to broadcast limits anyway: to my eyes the footage just feels more balanced that way.
Don’t sharpen if you are close to macro blocking
If you end up with dark blacks, don’t sharpen and brighten them . this is the easiest way to create really ugly macro blocking!
Avoid AVCHD compatibility problems
Although many applications now work with AVCHD, there’s still a few applications that do not. One of the non-workers is DaVinci Resolve, a professional coloring application that I strongly recommend you have a go with because (a) it is a true Pro application (as used in Hollywood Blockbusters) and (b) it is free from http://www.blackmagicdesign.com/uk/products/davinciresolve.
Although you can re-encode (transcode) AVCHD to another format to get Resolve (and older versions of more common video editing applications such as Premiere) working with AVCHD, you don’t want to do that because re-encoding either loses you quality or increases filesize for no reason. Instead you want to put the AVCHD stream into a more universal wrapper (Quicktime/MOV) to increase your footage compatibility without affecting quality. The way to do this is both easy, quick and free (the following steps are for Windows);
Download FFmpeg http://ffmpeg.zeranoe.com/builds/, selecting the 32 or 64 bit static version. Unzip the zip file, rename the unzipped folder to ffmpeg and put it somewhere you won’t delete it by accident (I placed it in my Program Files directory)
Run SmartFFmpeg and in the Options menu select the location of ffmpeg.exe (if you did the same as me, the path will be C:\Program Files\ffmpeg\bin)
smartFFmpeg: to rewrap AVCHD into Quicktime, set the red-arrowed options as shown, drag-drop your .mts AVCHD files into the top panne, and click the green RUN arrow (pointed at by the green arrow, top right)
Drag your AVCHD files into the window at the top of SmartFFmpeg, and use the settings in the image above. In particular, you need to (red arrows in image above)
Set Format to QuickTime/MOV.
Set the Threads value to as high as it will go if you want the conversion to take place as quickly as possible (although it wont take long as the process is really just moving the data into a new wrapper rather than transcoding).
Set Video Codec to COPY STREAM (important!)
Don’t enter or change any other setting
Then click the green RUN button at the top right. The MOV files will be created in the same directory as the .mts files. you will notice the MOv files are slightly smaller than the original ,mts file, but if you look at the two files in Bitrate viewer (more on Bitrate viewer below), you will see that the bitrates are exactly the same: the actual video stream is unchanged in the .MOV files.
As a .MOV file is generally more universal than a .mts file, you may consider always rewrapping your AVCHD files into QuickTime .MOV, and especially if you will be sharing your footage with other users or using the footage on old versions of common video editing applications (e.g. Adobe CS4 or earlier).
Update: see this post for a worked AVCHD example using most of the above tips in its workflow.
A common issue cited with Sony Alpha Video is maximum bitrates: the Sony range of cameras have a maximum bitrate of 28Mbit/s. My GH2 that has a maximum bitrate of 100Mbit/s or higher depending on which hack I load. Surely the GH2 is far better?
You can use this to view the bitrates in your AVDHD files. Run it and click Load. In the files of type: dropdown select All files and select one of your Sony A77 files. The application menu is the little icon on the top left corner of the window title bar (not shown in the screenshots, which look at the graphs only). Click this icon to see the menu, and select GOP based.
Bitrate graph of 10s clip, Sony A77 @24Mbit/s, 1080p, 25fps
You can now see a bar-chart of values. Each bar is one of the Group of Frames we talked about earlier. The first frame in each group is a whole frame, and subsequent frames consist of changes from the first whole frame. The height of each frame is how much of the bandwidth the group used up. For a 24Mbit/s A77 24/25p AVCHD, the max height of a GOP is the bitrate, 24000.
Notice something strange? Yup, the A77 never actually uses the full 24Mbit/s in our clip!
The internet is full of people saying that A77 AVCHD breaks up because there is not enough bandwidth, but as you can see, the truth is that the A77 often never even uses the full bandwidth! (The reason for A77 soft video is actually nothing to do with bandwidth, more on this later).
Want to see something even stranger? Here’s the exact same scene shot with my GH2 at 50Mbits/s and 100Mbit/s:
We see two graphs. The first is a 50Mbit/s AVCHD clip at 25p (Bitrate viewer tells us it is 50fps because the GH2 does 25p as a ‘pseudo 50i’), and the second is 100Mbit/s (1080p 24H ‘cinema), both shot with the ‘FlowMotion v2.2 GH2 hack’. To shoot these clips, I ran the cameras along a motorized sider whilst pointing at foliage 12 inches away. So the three graphs so far are showing identical scenes
Look at the A77 24Mbit/s (first graph) and GH2 50Mbit/s (second graph). The actual bandwidth used is far closer than the bitrates suggest: low 20s vs high 20s, and certainly not 100% difference!
The stated AVCHD bitrate is a maximum and only used if the scene requires it. Thus, if two cameras are shooting exactly the same scene, but one has twice the bitrate of the other, the quality of one will only be double the other if both cameras are using the maximum bitrate.
What the GH2 is doing that makes its quality better is it is using smaller GOPs, but that is only of advantage because I am forcing a very fast pan which is not typical of the ‘DSLR film’ style.
If I use a fast lens with wide aperture (in my case the Minolta 50mm f1.4, shot at f1.4) on the GH2, the bandwidth rarely goes above 50Mbit/s even though the stated bitrate may be over 100Mbit/s, and actual bitrate usually hovers around 30-35Mbit/s. As a fast lens used wide open is common in DSLR video, its worth noting that increasing bitrate may not give you much if you are shooting wide aperture filmic footage (and if you are not shooting that with a DSLR, you are probably misusing your equipment!).
Utilised bandwidth is always low when using fast, wide apertures, so high bandwidth AVCHD would be wasted: in most cases the 28Mbit/s available from most un-hacked cameras is pretty much all you will ever need in these cases.
But then we look at the LX7 footage of the exact same scene:
The LX7 is shooting at 50fps (it has no 24/25fps mode), which kind of explains why it is consistently using a higher bandwidth than the A77, but not why it is using so much more. In fact, the LX7 is using close to its limit of 28Mbit/s, and is the only one of the three cameras that is doing so. Why, when all three cameras are shooting the same scene? Because the LX7 has the smallest sensor, and is therefore capturing the sharpest input video. Sharp video looks less filmic though, so I often find myself having to soften the LX7 footage in post!
A small medium/low resolution sensor is better than a physically big, high resolution stills sensor for capturing sharp video, but you may find yourself having to soften this video in post to get a good ‘DSLR film’ look.
The LX7 has a small sensor. Such a sensor has very little in optical compensation (it is actually a very good infra-red photography camera because of its lack of sensor filters or micro lenses), and doesn’t need to do a lot of things the A77 and GH2 need to do for video. In particular, it does not need to smooth or average the signals coming from the sensor pixels, something we will touch on in the next section.
I find that the LX7 is always more likely to be using the maximum bandwidth out of my three cameras. The fact that the GH2 can shoot at over 100Mbit/s does not mean it is always capturing three times the video quality, and the fact that the A77 has the biggest sensor does not mean it is capturing the most light because it throws most of that data away… which brings us to the real reason why A77 video is often seen as ‘soft’…
Conforming stills sized images to video frames
A sensor optimized for stills is not the same as a sensor optimized for video. A current large (Full frame or APS-C) stills sensor is typically 25MPixels (6000×4000 pixels) or higher. To shoot video with the same camera, you have to discard a lot of that data to get down to 1920×1080. The way this reduction takes place makes a big difference on final video quality, and is more of an issue than bitrate, especially for most ‘average’ scenes you will take (i.e. ones that do not hit bitrate limits).
Although the Canons produce soft video, the A77 (and A99) is a little bit softer. This is probably because of processing overhead: the Canons only do 30fps, whereas the A77/A99 also do 50/60fps video, which means they do a more approximate line skipping/soften function to allow for the data throughput of the higher maximum frame rate.
The effects of the A77 line skipping does not show up at all on close or mid distance detail, but it does show up on far detail (because then the detail looks like it might be caused by the line skipping to the smoothing algorithm). The smoother turns distant foliage into a green mush, whereas something like the Panasonic GH2 keeps it all looking good.
I have seen this clearly when looking at A77 footage in Bitrate viewer. If I shoot a close subject, the footage actually looks very detailed, and the bitrates are close to the maximum, implying the A77 is capturing lots of detail.
For footage that contains lots of mid-long distance detail (trees and foliage, complex clouds, distant architecture and detailed terrain), the detail disappears and the bitrate reflects this – the A77 is discarding the data by smoothing it and is not even attempting to add it to the video stream: the bitrate is usually well below 20Mbit/s.
What to do? Most often, I do nothing.
I actually like the A77 ‘look’ because it more closely resembles film stock. As long as you keep to low apertures and let the distant objects defocus naturally through a low depth of field, you have no issue, and often don’t even need more than 24/28Mbit/s. You would shoot at low apertures if you want to shoot ‘DSLR film’ anyway, so distant detail is rarely an issue. If you are shooting close subjects with lots of detail behind them, the A77’s way of doing things actually maximizes detail on the main subject, so it makes sense both stylistically and in terms of best use of limited bandwidth.
Shooting with low apertures (top) prevents Sony alpha smoothing affecting your scene, and is usually stylistically better anyway. Shooting flat and then sharpening in post (bottom) can also often fix the problem
There is a slight issue with the A77 and wide aperture though: if you use autofocus during video, the camera limits you to f3.5. There’s videos on the internet telling you to get around this by jamming the lens aperture lever at wide open: don’t do this! All you have to do is
autofocus, then..
hit the AF/MF toggle, which..
drops you into manual and wide open.
Your camera will still be in focus (and you can use focus peaking to make minor adjustments in any case).
Of course, you will not now be able to change focus via autofocus for a moving object, but if you are wider than f3.5, you’re depth of focus is so thin that you probably should not expect to keep fast moving objects in focus anyway!
I use this trick with the excellent and inexpensive Minolta 50mm f1.4 (full frame), the Tokina 11-16 f2.8 (crop frame), the 16-50 f2.8 A77 kit lens (crop frame) and Sony 50mm f1.8 (crop frame), all of which give a very nice cinematic depth of field wide open, and give you a nice range of focal lengths for video (11-50mm then 80mm f1.4 from the Minolta, which is a nice portrait length and aperture for tight character shots) for not much cash.
If I absolutely need a scene with sharp middle and distant video with minimum extra kit over the A77, I take the LX7. You can now get hold of an LX7 for less than the cost of an A77 kit lens (the cost has gone down significantly because everyone wants a Sony RX100), and because of the LX7’s extremely small sensor, line skipping artifacts or smoothing just don’t occur in its AVCHD output. Plus the LX7 footage goes pretty well with the A77’s (as long as you know how to conform 50/60fps to 24/25 fps – the LX7 doesn’t do 24/25p).
Distant detail captured with the LX7. NB – the ‘look’ is different for this series of clips because I am using Tiffen DFX rather than Colorista for my post work, and not because I am using different cameras.
Best of all, like the A77, the LX7 requires almost nothing to shoot video.
All I needed was to add a 37mm screw thread (available from Panasonic but cheaper copies are available from eBay or Amazon) and a 37mm ND filter (Polaroid do a cheap one, again from eBay/Amazon).
The GH2 uses a pixel sampling pattern (or ‘pixel binning’) to reduce full sensor data to video resolution, so it averages data rather than just throwing it away. It also as an ‘Extended Tele’ mode where it just uses the center 1920×1080 pixels of the sensor, so it acts more like a small sensor camera such as the LX7 (and makes a 70-210 Minolta ‘beercan’ a telescope: 210mm x2 for full frame/MFT, then x4 for the tele mode, so over 1000mm effective with no loss of video quality!).
The GH2 can use its higher bandwidth to allow far more details to be brought out in post, and this is one of the big advantages of high bitrates with it. The hacks also give you >30minute constant recording and the ability to move between NTSC frame rates (for the US and web) and PAL (for weird non-standard outposts such as here in England).
The GH2 looks really really good on paper, but it has one big issue that means I still use the A77 more: the GH2 is a good camera, but the overall system is not. To get full features from a GH2, you need Panasonic MFT lenses, and they are awful: awfully slow and too long, or fast and awfully expensive. I therefore use my Sony Alpha lenses with the GH2, with manual focusing via an adapter. The GH2 has a poor focus assist (no focus peaking) so it is not the fast run-and-gun one-man camera that the a77 (or LX7) is.
So, we’ve looked at the disadvantages of the a77 (and their fixes). What are the advantages?
Advantages of the a77 over the GH2/LX7, and every other DSLR
There are several big advantages my A77 has over a high bitrate camera (i.e my hacked GH2) or a sharper-video small sensor camera (LX7):
Dynamic range. The A77 has far better dynamic range than any other DSLR. The GH2/LX7 will clip highlights like no tomorrow, but at low ISO (around ISO100-200), the A77 has better dynamic range than almost anything else out there, including the Canon 5D Mk3. You have far less leeway with the GH2, and one of the main reasons for it needing more bitrate is to help with the dynamic range. You don’t need this for the A77.
Focusing. The a77 SLT enhanced video focusing has no hunting. Every other camera I have used either hunts or doesn’t do video focusing at all. This makes hand held video with the A77 very easy, and in fact, shooting any video with the A77 is far easier than with any other DSLR I own or have tried.
Steadyshot. Before trying other video DSLRs, I believed the given truth that in-lens stabilization is better than the in-body version that the A77 uses. Not true. The A77 has a far smoother video stabilization system than the Panasonic MFT in-lens OIS system. Handheld is smooth with the A77 unless I run. Handheld with the GH2 and Panasonic OIS lenses is smooth only if I stand still. On the one occasion I borrowed a Canon DSLR from a friend, the required stabilization rig marked me out as a target for robbery or ridicule. Don’t even go there.
Minimum equipment required with the A77 for video is almost zero. You need a slightly better and bigger SD card than you do for stills and an ND filter, and perhaps a separate audio recorder (I use a Tascam DR07) and….um. That’s it. No additional monitor with focus peaking (comes with the camera). No shroud to put over the monitor (just use the EVF – it’s the same screen). No rig (steadyshot is damped enough for walking whilst shooting without recourse to sufficient prosthetics to make you look like a cyborg), and the kit-lens is the best video lens for the system, so no lens outlay unless you want to shoot really wide, long or in the dark (in which case get a Tokina 11-16, Minolta beercan or Minolta 50 f1.4, none of which are particularly expensive… and all of them do autofocus in video). In fact, dslrvideoshooter.com still recommends it as the best standalone DSLR for video here (its right at the bottom of the page).
Reliable. Its not until you stray away from the a77 that you begin to realize how reliable it actually is. Sony are very conservative, and the thing never breaks, and post 1.05 firmware, is nippy and fast.
‘Film-like’ output. If you want film like output, then soft video is not as much of an issue as half the internet seems to tell you. Further, if you are using wide apertures associated with the ‘film look’, then high bandwidth is not that much of an issue either. Thus, despite the fact that soft video and ‘only 28Mbit/s are both seen as disadvantages, once you actually start using the A77 for DSLR video, you find that in practice, neither matter, and you actually end up with pretty good footage if you want to create DSLR film. Of course, this advantage only occurs if you slightly overexpose, otherwise that 28Mbit/s will come back and bite you when you come to expose-up shadows!
The A77 may have a low bitrate, but the bitrate is enough for all non-pro uses a DSLR would typically be used for. Other DSLRs may have better bitrate, but that is not enough for them to be considered more ‘pro’ because none of them are on the preferred cameras list of the top broadcasters.
If you are shooting DSLR video, your target audience is web or personal events (such as weddings), and the AVCHD format sony use is all you need, assuming you take care to shoot flat. If you are really good, you might be able to squeeze out an Indie short, but you might be better off just learning on a DSLR and perhaps using it for some shots, but then hiring pro gear for a week for the main shoot. Finally, the A77 is simply reliable: it rarely fails on focusing or dynamic range enough to kill a take.
The big advantage of the A77 is that you need very little to get started shooting video with it: no rig, no focus control, no monitor and none of the other video doohickeys apart from an ND filter and maybe a separate audio recorder. That 16-50 f2.8 you got with the A77 is FAR better than most other lenses for video, so think carefully before abandoning it.
The fact that the Sony Alpha shoots 28Mbit/s AVCHD is a non issue: higher bitrates are not as important as you think most of the time, and a camera shooting at double the bitrate may actually be recording almost the same quality video.
By far the most important thing in your setup is not actually the camera, but how you use it. You can get around the Sony soft-distant-video simply by shooting wide aperture DSLR film. Canon users had the same issues with soft video, and if you look at default Canon video straight out of the camera, it looks a lot like default A77 video straight out the camera. With all DSLRs, the trick is to shoot with wide apertures.
I have bought a GH2, and although it does output sharper video, that sharpness is not always a good thing. The GH2 with Panasonic lenses can actually be too sharp, and old DSLR lenses are often the way to go (I use Minolta AF or Rokkor) often give a more filmic feel, that will bring you back to square one: it will look like default A77 footage!
My favorite setup is to use the Sony A77 and the LX7. Neither need much setup or additional kit for video, and the footage from them goes well together. They complement each other as a DSLR+DSLR replacement when shooting stills, and as a main and backup camera for video. I’m also glad I didn’t opt for the RX100 as my ‘DSLR replacement’ now that I know how good the LX7 is for video!
NB – I had previously promised video cheat sheets for the a77 along with this post… but as this post has overrun, I will have to blog them later. Sorry!
Notes
It’s important to differentiate between a file on your computer (such as a .mts AVCHD file or mp3 or mp4) and the codec. The file holds data and tags that tell an application what it needs to use that data. The tags hold information such as ‘this is the video data, and this is the audio data, and this is what you need to use to play them together’. The codec is the ‘what you need’ bit, and is a part of the application that opens the file (although it may be provided by the operating system). The codec may be strongly associated with the file type (such as .mp4 files and the MPEG4 codec), it isn’t always the case: the filetype may be able to contain several slightly different codecs, or future computers may choose an updated and different codec. Although this distinction may not have been something you need to consider when you are just playing video files, now that we are editing and creating our own videos, an understanding of the underlying codecs we will be using is critical. In particular, to edit a given file, you need to know which codecs are required to decompress it, or have an authoring tool that knows for you. As of 2013, you are in luck, because almost all applications worth using recognize AVCHD fully, so you have nothing to worry about.
Although most codecs are designed to reduce file size, some codecs have very little compression because they are written for editing rather than simply viewing, and place quality over everything else. They are sometimes referred to as ‘intermediate codecs’ because they are not designed for playback. You will hear about ProRes, Cineform, Avid DNxHD, and other such editing formats on the internet, usually by someone telling you it’s not worth editing video unless you are using one of them. Unless you are getting uncompressed video from your camera via a raw format or clean HDMI out (if you are not sure what that means, you are not), then you don’t need to bother with intermediate codecs, and probably never need to change your file format during editing. If you really must use an intermediate codec for your video editing, have a look at Lagarith or Ut Video (PC) or Avid DNxHD (PC/MAC). All are free, so all you will be wasting is hard drive space! In a nutshell, pro codecs are only useful with pro cameras, and no DSLR is a pro video camera, so go with what you get out of the camera.
Some GH2 hacks try to use high bit rates irrespective of whether the current scene requires it or not, such as Driftwood’s ‘Moon T7’. T7 is the highest bitrate hack available for the GH2 as of this writing. It has a major advantage in that it adds massive amounts of data to shadows, and this allows you to lift them much more than either the A77 or other GH2 hacks. It also gets rid of AVCHD GOPs altogether by having a GOP size of 1, which makes the resulting AVCHD render much faster in Premiere (although the much larger filesize means it will hit your hard drive on file open). However, I find the ability to lift shadows via T7 is somewhat compromised by increased noise and some instability (occasional dropped frames and fail to save to SD card mid-shoot unless you use very specific SD cards). For these reasons, I find using a lower bitrate hack (such as Flowmotion) and overexposing to be a safer bet, purely on reliability contraints.